A lot of the hardware on Cub Cadets came from the factory plated to protect it from corrosion. As far as I know, the hardware was originally Cad plated. To me, it's not "correct" to paint things like the bolts that hold the hood on and the rear wheel lug bolts, for instance. These were plated from the factory, and should remain so on a restoration, in my opinion. Zinc is a fairly easy metal to plate things with; it is fairly cheap, doesn't require REALLY nasty chemicals (just slightly nasty ones), and it polishes up to a nice finish if you want it to. It is also much more durable than paint. The zinc protects the steel underneath by corroding instead of the steel.
Zinc electroplating can be done with about $65 or so in materials, assuming you have some basics such as a battery charger. Before we proceed any further with this, I must add the following:
While fairly safe, there are some corrosive and dangerous chemicals used in this, as well as lethal levels of electric current that can do very serious harm to your body if you are not careful and/or don't know what you are doing. By putting this out for all to see, I trust that you'll be careful with this. I am NOT responsible for any injuries, destruction of property, etc. that occur as a result of you plating things. I have had a number of chemistry classes and I know how to handle all of the chemicals used here. If you are uncomfortable with handling the chemicals or don't feel comfortable with anything you read here, PLEASE DON'T ATTEMPT IT.
Now that we've got that out of the way, let's proceed! Steps requiring extra caution will be marked with this:
We'll start with the list of materials:
There's probably a couple of other random things you'll need that I can't think of, but they should appear later in this document.
Here's some good background info on electroplating: Electroplating on Wikipedia
We'll start with the construction of the plating tank, since this is needed before anything else can be done.

As you can see, my tank is very simple. It's a 2 gallon plastic bucket with a couple of pieces of scrap wood to hold it and hold the zinc anode. The piece of wood on top is mounted with one screw and swings from side to side to accomodate different shapes and sizes of parts to be plated. I drilled a hole in the zinc anode about 1/2" deep and tapped it for a #10-32 stud so that I could raise and lower it in the solution, depending on how high or low I needed it. The 1/4" carriage bolt is for the negative side of the battery charger to connect to, and it has part of its length exposed to attach the wire "trees" to that are in the solution. It's good to mark the polarity right on the piece of wood so you can't screw it up.

After the tank is constructed, it's time to mix the electrolyte. Two salts are needed for this: Ammonium Chloride (NH4Cl) and Zinc Chloride (ZnCl2). (The Muriatic Acid is for cleaning parts before plating)
The electrolyte is comprised of the following: 3 parts Ammonium Chloride solution at a concentration of 160g/L to 1 part Zinc Chloride solution at 80g/L. This works out to 480g of Ammonium Chloride and 80g of Zinc Chloride in a bit over 1 gallon of water. The Ammonium Chloride is to make the water conduct electricity easily, as far as I can tell, and the Zinc Chloride might be to keep the part being plated clean as it is plated. I don't really know. This is a fairly low concentration solution, so splashes shouldn't be TOO dangerous, but still wear gloves and eye protection. Anyway, measure out about the amount of water you need for your tank (tap water is OK) and carefully measure out and pour in the appropriate amounts of both the salts, and stir with something plastic or wooden until everything is completely dissolved. You can pour this into the tank at this time. Heck, you can even mix the stuff together in there.
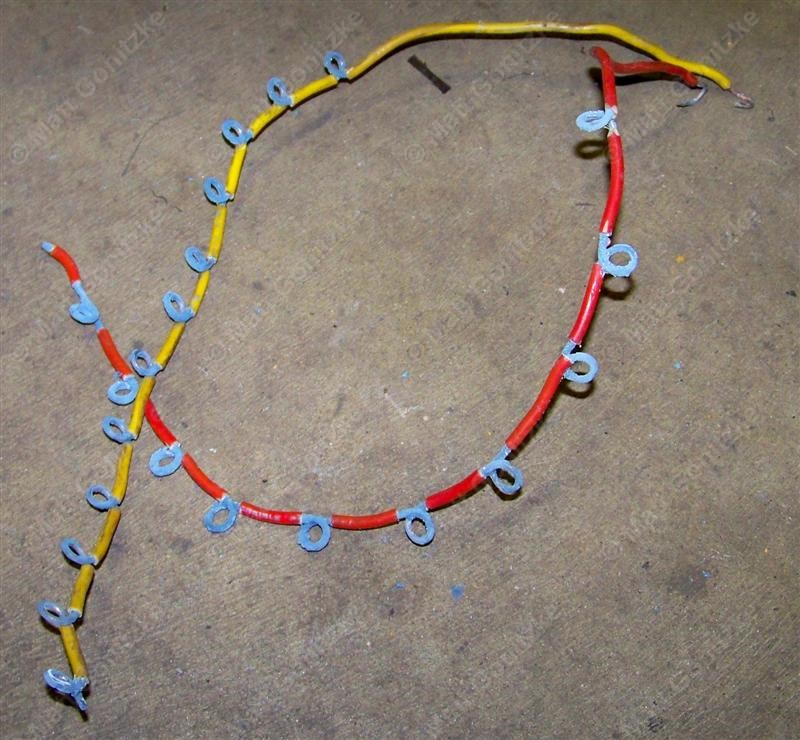
There's probably some fancy name for these things, but I'm calling them trees. Anyway, get some SOLID CORE copper wire (I had 12 ga. but thinner would be alright up to 18 ga. or so) and strip off 1 1/4", leave 1", and repeat until you get to the end of the wire. TIP: Don't even think about trying to use stranded wire. It just won't work. The loops won't hold their shape, among other problems. Stick with the solid core wire. You can make it as long as you want depending on the size of your tank. Mine are made from 12-18" pieces of wire. They wind up shorter when you are finished. Now wrap each bare spot around the threads of whatever size bolt you are plating. I started with 3/8" bolts because you can fairly easily make the loops fit smaller bolts and then go back to larger ones, but it's too hard to start with small and go to large. I would crimp/solder a terminal end onto the end of the tree that connects to the terminal on the tank to simplify attaching and detatching it, since you'll have to do that many times. I also made a different tree for each diameter of bolt for 5/16" and 3/8" to simplify things because I have a lot of bolts to plate. I can do 22 bolts at once with the two trees, and that is the limit of this size tank, as far as I'm concerned. It's too hard to do more than that, as the parts tend to flash rust before you can put them on the tree. Plus, the trees get all tangled up in the tank.

Muriatic Acid (Hydrochloric Acid to chemists) is pretty nasty stuff. Always wear goggles and gloves when handling it. Don't get it anywhere near anything you like, as the fumes will eat paint and make things rust away.
Now for the acid itself. Get a gallon of Muriatic Acid and two plastic containers: one with a tight-fitting lid to keep the acid itself in (a plastic coffee can works great) and something that'll fit inside to make a strainer out of. Take the smaller container and punch/drill it full of small holes so it can drain. This is what you'll put your bolts and things in to clean them in the acid before you plate them. This way, you don't have to touch the acid at all; you can remove the strainer with the items in it and rinse it. You're looking for about a 30% or so solution of acid. IMPORTANT: Put the water in the container FIRST, then add the acid SECOND. Remember, always add acid to water, NEVER the other way around. After you're done, seal the container and label it clearly so everyone knows to be careful with it.
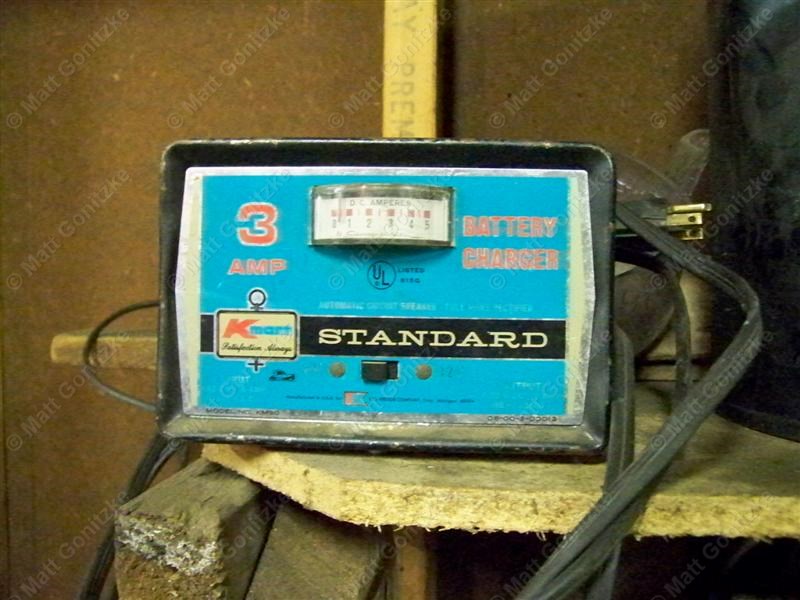
This being electroplating, we'll need a source of electricity for this. A battery charger is what I use, but a model train controller or something similar that regulates current and outputs 6-12V will also work and be better for smaller setups. The tricky part with the battery charger is that it can't regulate the current on its own. I have mine plugged into an outlet with a dimmer switch to regulate the current, but this is barely adequate, as I can't get the current below 2 amps (on the 6V setting) and therefore, I have to plate a lot of stuff at once. More on that later.
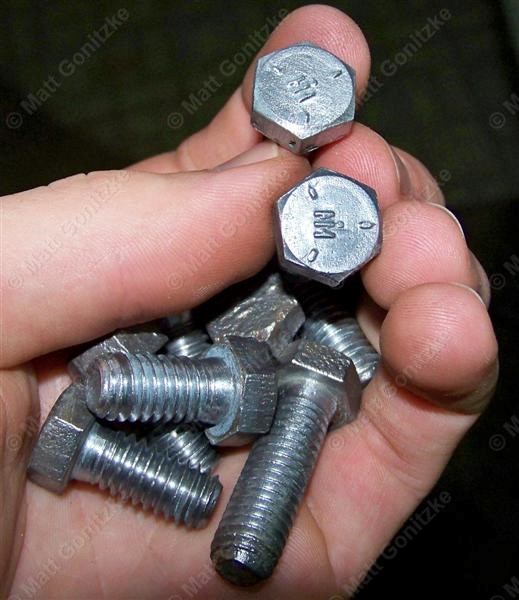
Now that everything is constructed, it's time to plate something! Now, as far as I can tell, steel and iron are the two metals that can be plated by this method. The zinc doesn't seem to stick to the copper very well, and both copper and aluminum parts will be rapidly eaten by the acid needed to clean the parts before plating. I should also mention not to waste your time plating pitted bolts and things like that. Bolts that go in looking like crap come out looking like zinc-plated crap. Not to mention pitted stuff flash rusts faster after the acid bath for some reason. So having said that, grab some steel or iron parts that need to be replated, and as a first step, remove all of the rust. You can do this by various means, including wire wheeling, electrolysis, acid, sandblasting, etc. I clean parts in my electrolysis tank and then wire wheel them to get all of the rust and paint remnants off. For the zinc to stick, the parts have to be VERY, VERY, VERY clean. This means they must be cleaned in the acid bath discussed previously. Muriatic Acid won't eat steel very fast, so you can leave parts in it for 45 minutes to an hour. It is also very important that you don't touch the parts with bare fingers, as the oil in your skin will contaminate the parts and prevent the zinc from sticking. Only handle the parts with rubber gloves until the plating process is complete.
While the parts are in the acid, you can set the tank up by connecting the the voltage source. Connect the zinc anode to the POSITIVE terminal and the terminal for the parts trees to the NEGATIVE terminal. It helps to write + and - signs near the terminals on the tank so you can't forget which is which. If you get them backwards, you'll probably get a steel-plated zinc ingot, which isn't what you want. After the parts are done cleaning in the acid, rinse them thoroughly with water. At this point, you must work quickly, as the parts will flash rust 30 seconds to 1 minute after they dry, so DON'T DRY THEM! Leave them damp, connect them to the tree (it helps to do a dry run before the acid cleaning so that you can quickly connect everything up when it's time) and then get them into the electrolyte in the tank, which prevents them from flash rusting because they aren't exposed to the atmosphere in there.
Connect the trees to the negative terminal post on your tank, double check the connections to the voltage source, and then plug it in. You need to regulate the current so that the parts plate at an optimal rate. Too little current plates slowly and wastes your time, and too much current plates too fast and leaves a rough finish. Another website I found stated that the current should be 0.1 amps per square inch of material being plated. I wasn't about to try to calculate the surface areas of all of the objects I'd be plating, so I found something that worked by trial and error. For plating 12-24 bolts, the max I can do at once, 3 amps on the 6V setting seems to work well. The 12V setting won't allow the current under 4 amps with my setup, so I used the 6V setting so I'd have more control. The dimmer switch outlet in our garage works great for this. If you don't have one, you may have to wire a little box with a dimmer switch to plug into the wall.
Now, you can walk away for an hour to an hour and a half. The first time you plate something, you should check frequently to make sure everything is working right. You should see bubbles on the zinc anode and a gray coating appearing on the parts. After awhile, the parts will be furry. I'm not sure what causes this and if it's bad or not, but I had better luck taking the parts out every 1 to 1.5 hours and rinsing the furry stuff off. When I plate bolts, I plate for 4 hours, stopping every hours to clean off the furry stuff. I also screw the bolts into the tree a few turns further every time I clean them so all areas get plated. Electroplating is line-of-sight to some extent, so turning them helps evenly plate the heads and ensures the threads are completely plated. Be sure to unplug the voltage source before disturbing any connections.
After 4 hours or so, you can rinse the furry stuff off for the last time. The parts will have a crusty, blue gray look to them. I made a tumbler to clean this off to expose the shiny zinc, but gently wire wheeling the parts works well, too. Just rinse and dry the parts (you can touch them with your bare hands now) and gently wire wheel them to remove the crusty stuff. Wear eye protection and a dust mask. You don't want to breathe in what you're removing from the bolts! If you did everything right, your parts will have a shiny coating of zinc on them. At this point, you are finished!
I've only been doing this for a few weeks at this point, but there isn't too much required in terms of maintenance of the setup. Keep the tank with the zinc and electrolyte covered when not in use to avoid contamination. The zinc anode will turn black, but this can be left alone as far as I can tell, as it doesn't seem to affect the performance. The furry stuff collects in the bottom of the tank, and I imagine I'll need to filter all of that out every so often. I'll add more to this as I discover more.
Here's all the numbers in one place...
| Ammonium Chloride concentration | 160g/L |
| Zinc Chloride concentration | 80g/L |
| NH4Cl solution to ZnCl2 solution ratio | 3:1 |
| Muriatic Acid concentration | 30% |
| Acid bath time | 45 min. to 1 hour |
| Voltage/current setting | 6V and ~3 amps for most parts |
| GENERAL current formula | 0.1 amps/sq. in. of part surface area |
| Time between rinsings | 1-1.5 hours |
| Total plating time | 3-4 hours |
These include sites where I got information from, and the materials I bought.
Zinc PlatingThere is a lot of info in here, so read everything carefully a few times before trying it out. If you have any questions, feel free to email me with any questions or comments. If you decide to try this and find something that works especially well or doesn't work, please tell me about it so I can add it to this so it can help everyone.